
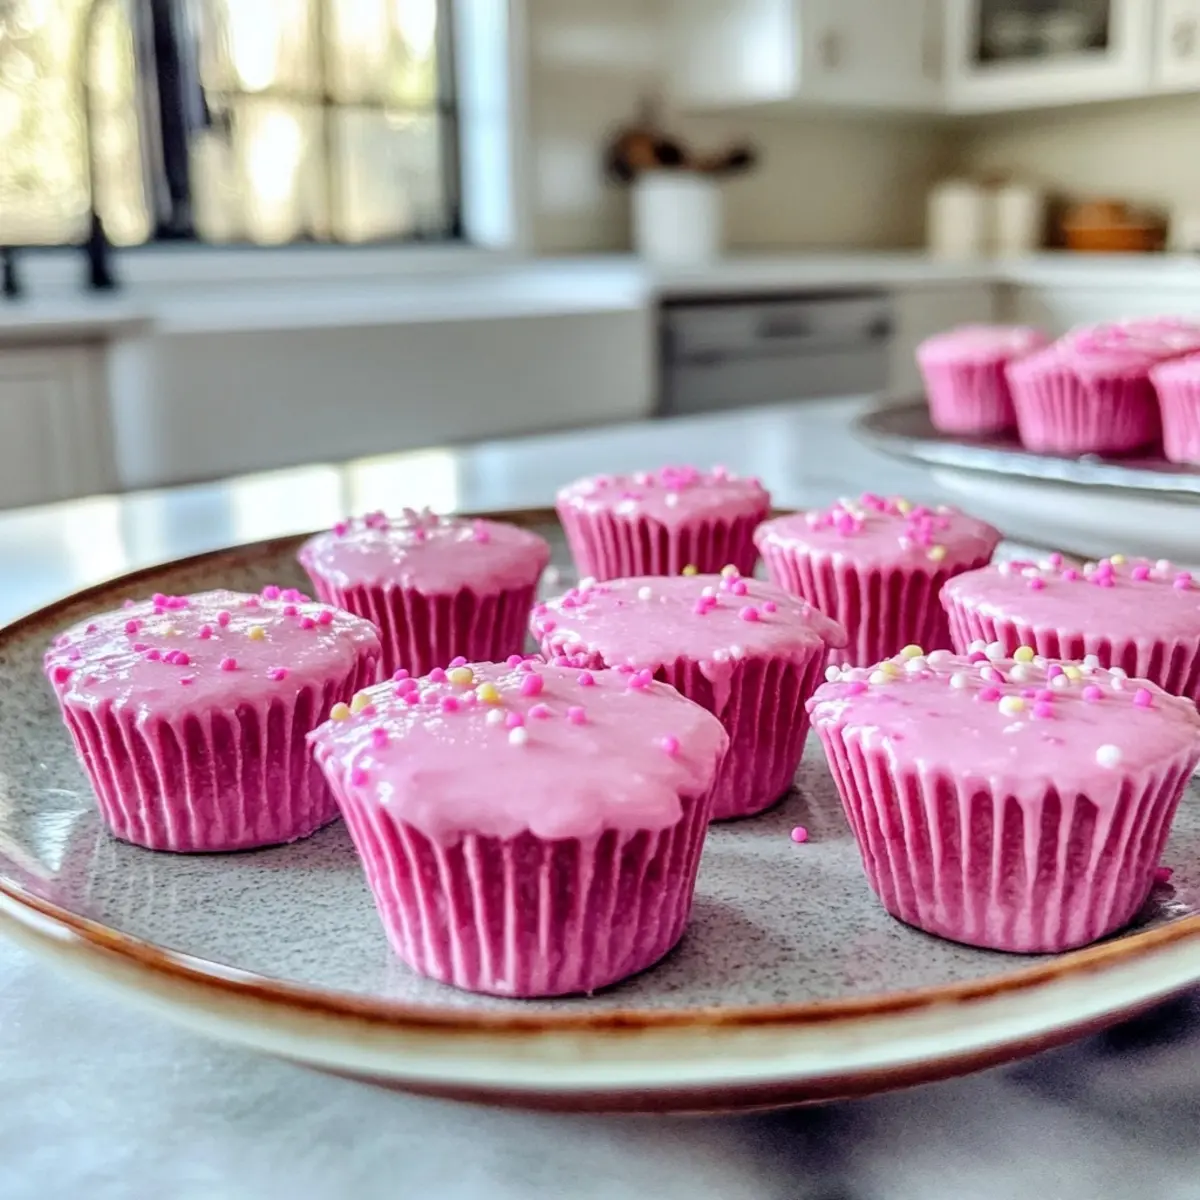
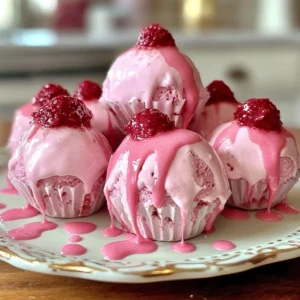
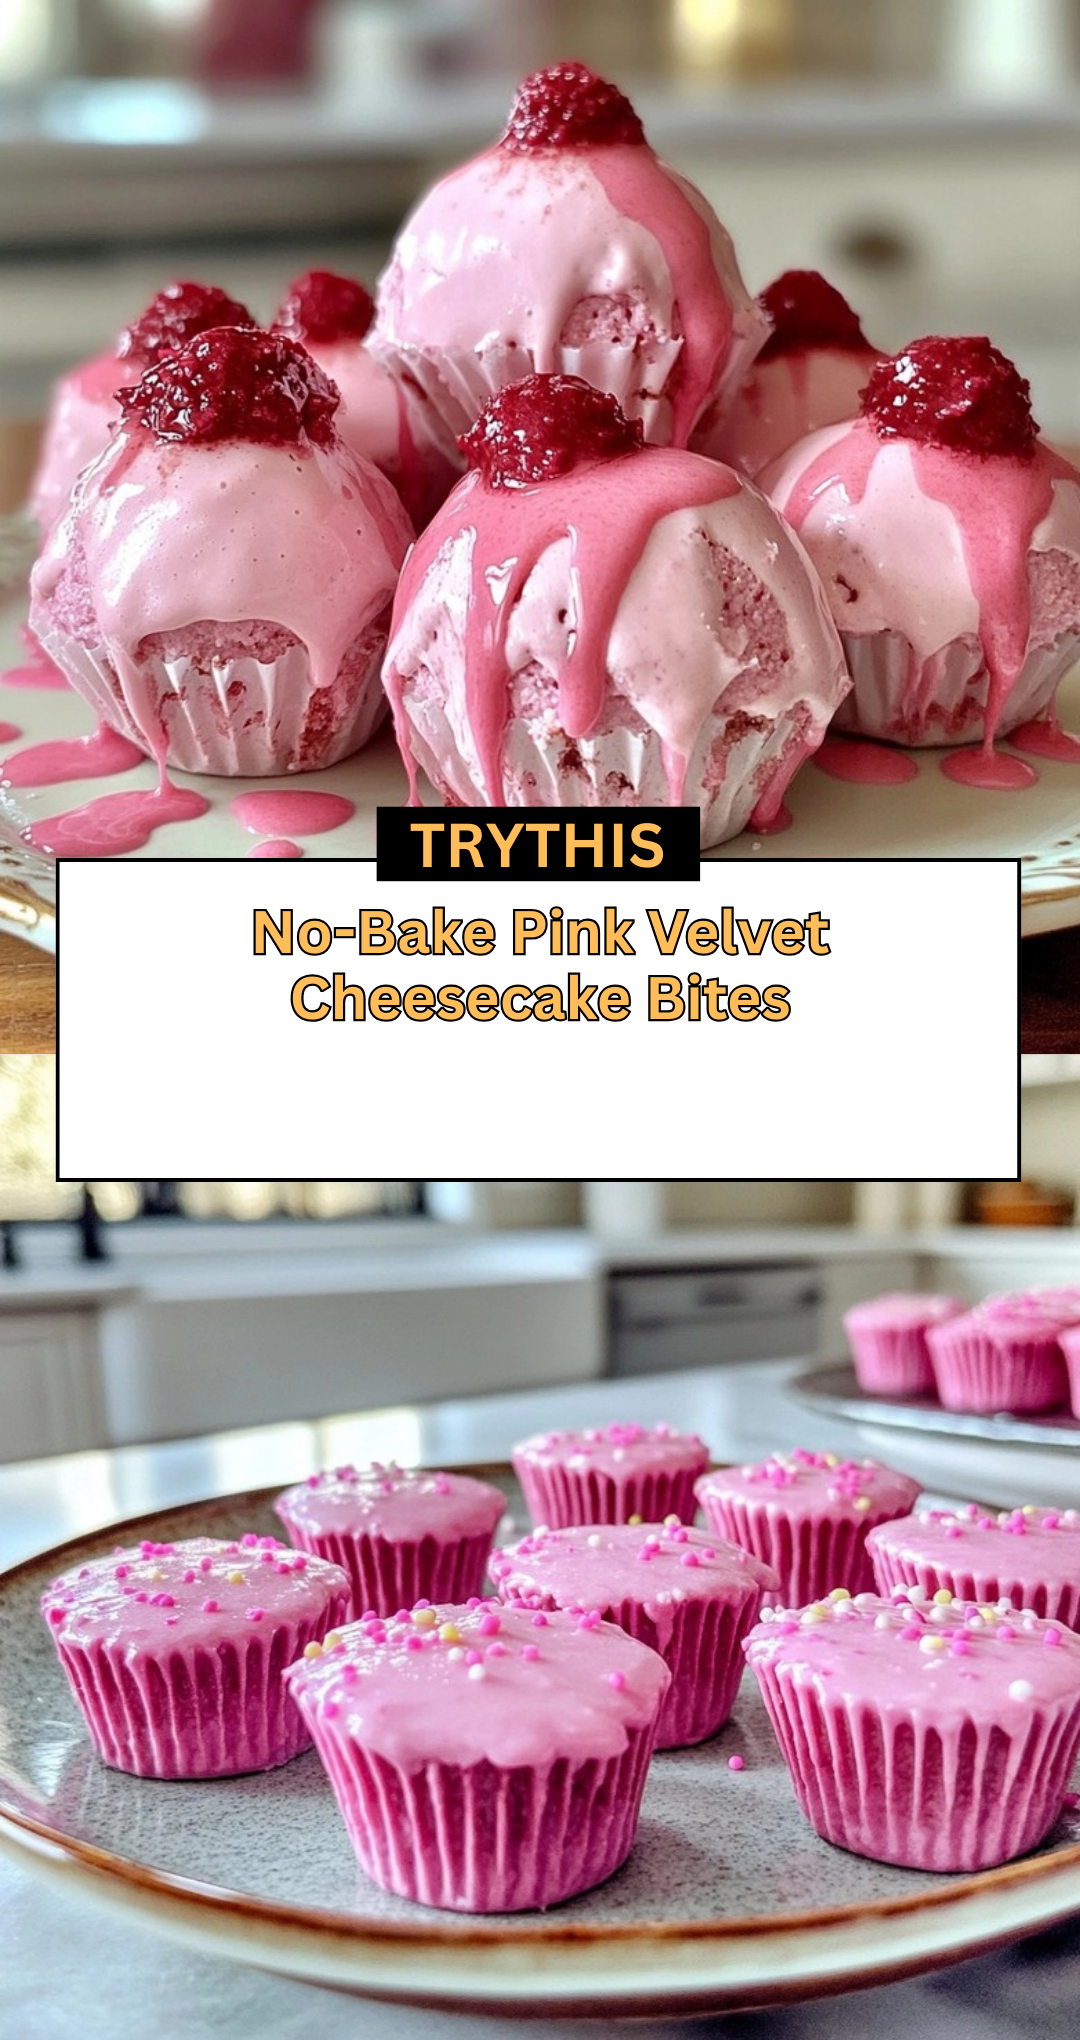
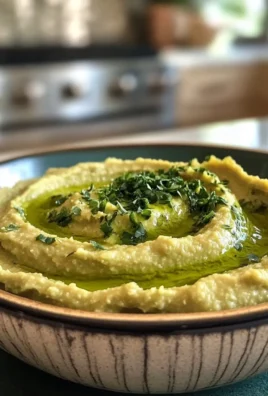
As the festive season approaches, there’s nothing quite like the joy of creating sweet treats that not only please the palate but also bring a pop of color to your dessert table. Picture this: the rich, velvety texture of cheesecake mingling with a hint of vanilla, all enveloped in a delightful pink hue. At that moment, you realize indulgence doesn’t have to come with a hefty time commitment. Enter my No-Bake Pink Velvet Cheesecake Bites—tiny morsels of creamy bliss that require no oven and a mere handful of ingredients.
This recipe was inspired during a recent gathering, where I found myself longing for a dessert that would impress without keeping me tethered to the kitchen. With these dreamy bites, I discovered not only the power of simplicity but also the magic of flavors that come together effortlessly. These cheesecake bites melt in your mouth, offering a playful twist that’s as festive as it is delicious. Perfect for special occasions or a sweet pick-me-up, you’re going to love how easily they can elevate any gathering!
Why are No-Bake Pink Velvet Cheesecake Bites irresistible?
Delightful Presentation: Each bite showcases a stunning pink hue, making them a centerpiece on any dessert table.
Effortless Preparation: With no baking required, they’re a breeze to whip up—even for the busiest chefs!
Mouthwatering Creaminess: The rich cream cheese base delivers a luxuriously smooth texture that melts beautifully.
Versatile Flavor: The option to mix in various extracts or fruits allows for endless customization.
Crowd-Pleasing Appeal: Everyone loves a sweet treat, and these bites are sure to win over guests of all ages!
No-Bake Pink Velvet Cheesecake Bites Ingredients
• Indulge in these bites with this essential ingredient list!
For the Cheesecake Filling
- Cream Cheese – Provides a creamy and rich base for the bites; substitute with mascarpone for a lighter texture.
- Granulated Sugar – Sweetens the cheesecake mix; powder sugar can offer a smoother blend.
- Vanilla Extract – Adds depth and warmth to the flavor; try almond extract for a unique twist.
- Pink Food Coloring – Enhances the visual appeal; opt for natural food coloring for a healthier choice.
For the Crust
- Graham Cracker Crumbs – Forms the base crust; crushed cookies or gluten-free crumbs can be used for a different texture.
- Butter – Binds the graham cracker crust; coconut oil serves as a great dairy-free alternative.
These No-Bake Pink Velvet Cheesecake Bites will enchant your guests with their delightful flavors and colors!
How to Make No-Bake Pink Velvet Cheesecake Bites
- Prepare the Crust: In a mixing bowl, combine graham cracker crumbs with melted butter until well mixed. Press the mixture firmly into the bottom of a lined baking dish, creating a solid base. Chill in the refrigerator until set, about 30 minutes.
- Mix the Cheesecake Filling: Using an electric mixer, beat the cream cheese with granulated sugar and vanilla extract until smooth and creamy. Add pink food coloring gradually, mixing until you reach your desired shade of pink.
- Fill the Crust: Spread the cheesecake filling evenly over the chilled crust, smoothing the top with a spatula. Make sure it’s nice and even so every bite is delightful!
- Chill: Cover the dish with plastic wrap and refrigerate for at least 4 hours, or until the cheesecake bites are firm and fully set.
- Cut and Serve: Once set, carefully slice into bite-sized pieces. Serve chilled, and enjoy the delightful reactions from your guests!
Optional: Garnish with fresh strawberries or a drizzle of chocolate sauce for an added touch.
Exact quantities are listed in the recipe card below.

Expert Tips for No-Bake Pink Velvet Cheesecake Bites
- Room Temperature Cream Cheese: Make sure your cream cheese is at room temperature for easy mixing and a creamy texture in your cheesecake filling.
- Avoid Over-Mixing: Mix the cheesecake filling just until smooth to prevent incorporating too much air, which can create unwanted air bubbles.
- Chill Properly: Allow the bites to chill for at least 4 hours to achieve that perfect firmness. Rushing this step can result in a soft filling.
- Perfect Portioning: Use a sharp knife to slice the cheesecake bites for clean edges. Wipe the knife after each cut for stunning presentation.
- Natural Food Coloring: Opt for natural pink food coloring for a healthier and equally vibrant hue, making your No-Bake Pink Velvet Cheesecake Bites even more delightful!
Make Ahead Options
These No-Bake Pink Velvet Cheesecake Bites are perfect for busy home cooks who want to save time without sacrificing deliciousness! You can prepare the crust and the cheesecake filling up to 24 hours in advance. Simply mix the graham cracker crumbs with melted butter, press it into your dish, and chill it for about 30 minutes. Then, make the filling and store it in an airtight container in the refrigerator. When you’re ready to serve, spread the cheesecake mixture over the crust, refrigerate for at least 4 hours, and enjoy creamy perfection that tastes just as fresh and delightful as if you made it that day!
No-Bake Pink Velvet Cheesecake Bites Variations
Feel free to let your creativity shine while making these delightful bites, and tailor them to match your taste and dietary needs!
- Oreo Crust: Swap the graham cracker crust for crushed Oreo cookies for a rich, chocolatey flavor. Each bite will turn into a mini indulgence.
- Vegan Delight: Substitute cream cheese with whipped coconut cream to create a vegan-friendly version. The creamy texture remains, while the flavors still shine.
- Fruit Infusion: Mix in crushed strawberries or raspberries into the cheesecake filling for added fruity goodness. It adds a fresh twist that meshes beautifully with the creaminess.
- Nutty Crunch: Fold in finely chopped nuts like pecans or almonds into the crust for an added crunchy texture. They not only enhance the flavor but also give a delightful bite.
- Minty Fresh: Add a few drops of peppermint extract to the cheesecake mixture for a refreshing mint flavor. It’s a surprising twist that takes these bites to the next level.
- Spiced Flavor: Incorporate a dash of cinnamon or nutmeg into the crust for a warm flavor. This subtle spice can create a lovely autumn vibe.
- Chocolate Drizzle: Finish with a drizzle of melted chocolate on top for a rich contrast against the pink. It is not only visually appealing but deliciously satisfying!
- Colorful Variance: Use different natural food colorings or even pureed fruit to create various colored bites. This opens up a whole new world of vibrant treats for special occasions!
Storage Tips for No-Bake Pink Velvet Cheesecake Bites
Fridge: Store your No-Bake Pink Velvet Cheesecake Bites in an airtight container in the refrigerator for up to 5 days, keeping them fresh and delicious.
Freezer: For longer storage, freeze the bites for up to 3 months; layer them between wax paper to prevent sticking and ensure easy access.
Thawing: To enjoy frozen bites, simply transfer them to the fridge the night before or let them thaw at room temperature for about 30 minutes.
Presentation: If serving straight from the refrigerator, garnish with fresh berries or chocolate drizzle just before serving for that extra special touch!
What to Serve with No-Bake Pink Velvet Cheesecake Bites?
Indulge in the sweetness of these delightful bites as you create a full and festive dessert experience that tantalizes the taste buds.
- Fresh Strawberries: Juicy and vibrant, strawberries add a burst of freshness that beautifully balances the creamy sweetness of the cheesecake bites.
- Whipped Cream: Light and airy, a dollop of whipped cream elevates each bite, adding a luxurious touch that everyone will adore.
- Chocolate Drizzle: A drizzle of rich chocolate sauce enhances flavor and introduces a delightful contrast to the pink cheesecake’s sweetness.
- Mini Chocolate Cupcakes: Their chocolate richness and fluffy texture offer a delightful contrast while complementing the sweetness of the pink bites.
- Fruit Skewers: Colorful and refreshing, skewers of mixed fruits provide a bright, fresh crunch that pairs exquisitely with the cheesecake’s creamy texture.
- Sparkling Rosé: The effervescence and fruity notes of sparkling rosé create a joyful, celebratory atmosphere, enhancing your dessert experience.
- Coffee or Espresso: A warm cup of coffee or espresso rounds out the sweetness, balancing flavors while providing a cozy pairing.
- Macarons: Colorful and crunchy, these French delights can add a playful touch and compete for attention with your beautiful cheesecake bites.
- Ice Cream: A scoop of vanilla or berry ice cream can make for an indulgent dessert duo, bringing cold creaminess that pairs perfectly with the bites.
- Chocolate-Covered Pretzels: Sweet and salty, these bites add a different texture, enhancing the dessert table with their crunchy, savory goodness.

No-Bake Pink Velvet Cheesecake Bites Recipe FAQs
How do I select the best cream cheese for the filling?
Absolutely! Choose a high-quality cream cheese that is creamy and smooth. Look for brands that specifically say “block” cream cheese, as they are less watery compared to spreadable varieties. Ensure the cream cheese is at room temperature before mixing, as this will make the process much easier and yield a smoother filling.
How should I store No-Bake Pink Velvet Cheesecake Bites?
Store your No-Bake Pink Velvet Cheesecake Bites in an airtight container in the refrigerator for up to 5 days. This keeps them fresh and delicious! For an even longer shelf-life, you can freeze them for up to 3 months. Just make sure to layer them between pieces of wax paper to prevent sticking.
Can I freeze No-Bake Pink Velvet Cheesecake Bites? What’s the best way to do it?
Yes, you can freeze these delightful bites! To freeze them, first cut them into pieces, then arrange them in a single layer on a baking sheet and place in the freezer for about 1 to 2 hours until firm. Once they are frozen, transfer them to an airtight container or a heavy-duty freezer bag, separating layers with wax paper to avoid sticking. They can be kept frozen for up to 3 months, making them a great make-ahead dessert!
What should I do if my cheesecake filling is too runny?
If your filling turns out runny, don’t worry! You can fix it by adding more cream cheese. Make sure it’s at room temperature, then blend in small increments until you achieve a thicker consistency. Additionally, chilling the mixture for a longer time in the refrigerator can also help firm it up. Just remember not to overmix to avoid air bubbles.
Can I make No-Bake Pink Velvet Cheesecake Bites gluten-free?
Very! To make these bites gluten-free, simply substitute the graham cracker crumbs with crushed gluten-free cookies or alternative crumb options, such as almond meal or gluten-free graham crackers. This allows everyone to indulge in these creamy treats without worries!
Are there any allergy considerations?
Absolutely! Since this recipe contains dairy, it’s essential to inform your guests if they have lactose intolerance or dairy allergies. For a dairy-free alternative, you can use whipped coconut cream instead of cream cheese and coconut oil in place of butter. Always double-check ingredient labels if you’re accommodating for other allergies!
Indulge in No-Bake Pink Velvet Cheesecake Bites Today!
Equipment
- Mixing bowl
- Electric mixer
- Baking dish
- Spatula
Ingredients
Cheesecake Filling
- 8 oz Cream Cheese Room temperature for easy mixing.
- 1/2 cup Granulated Sugar Powder sugar can also be used.
- 1 tsp Vanilla Extract Optional: use almond extract for variety.
- 1 tbsp Pink Food Coloring Use natural for a healthier option.
Crust
- 1 cup Graham Cracker Crumbs Can substitute with crushed cookies or gluten-free crumbs.
- 1/4 cup Butter Coconut oil for a dairy-free option.
Instructions
Preparation Steps
- In a mixing bowl, combine graham cracker crumbs with melted butter until well mixed. Press the mixture firmly into the bottom of a lined baking dish, creating a solid base. Chill in the refrigerator until set, about 30 minutes.
- Using an electric mixer, beat the cream cheese with granulated sugar and vanilla extract until smooth and creamy. Add pink food coloring gradually, mixing until you reach your desired shade of pink.
- Spread the cheesecake filling evenly over the chilled crust, smoothing the top with a spatula.
- Cover the dish with plastic wrap and refrigerate for at least 4 hours, or until the cheesecake bites are firm and fully set.
- Once set, carefully slice into bite-sized pieces. Serve chilled.
Notes

Leave a Comment